Earlier in 2018, Ableton Live 10 launched with a trio of powerful new audio effects:
Drum Buss, Echo, and Pedal.
Instead of another article teaching you the basics of each plugin, I want to show you a handful of ways I’ve been using these three effects to get more creative inside Live.
Let’s get right to it.
Drum Buss
Drum Buss was an unexpected but readily welcomed addition to Ableton Live 10. It’s an amazing way to add warmth, grit, and distortion to your drums (and a whole lot more).
Let’s look at 5 quick tips to get you comfortable with Drum Buss.
Ignore The Name
The plugin is called Drum Buss, but it’d be a shame if you only used it only on drums. Drum Buss is a compressor, saturator, transient shaper, and resonator all in one. Calling it a drum processing tool” is an understatement. While it sounds great on drums, it can work on so much more.
This tip is a call to action to try Drum Buss out on everything: synths, basses, vocals, percussion, and of course, drums.
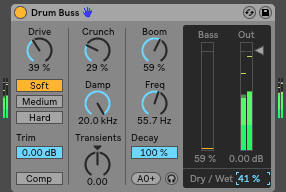
You may find with certain sounds that Drum Buss can be a bit too aggressive. If that’s case, make full use of the Dry/Wet control on the bottom right.
Push sounds to their limit, find a character and tone you like, then dial it back with the Dry/Wet.
Drum Buss Preamp
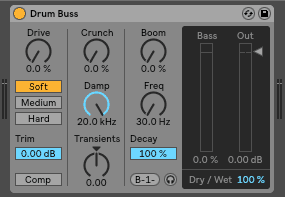
Experimenting with Drum Buss, I noticed there is no “off” setting. In other words, even with every knob at 0%, there is still some distortion being applied.
Although subtle, it’s often the perfect amount needed to add that extra touch to sounds. I’ll use it when other distortion effects are too noticeable, but I’d still like to add a little bit more body and presence to a sound.
Let’s look at an example.
I added a Drum Buss to a pluck loop, setting all of the controls to 0.
In the clip below, I’ve automated a Drum Buss on/off every two bars, allowing you to quickly A/B the effect.
The effect is subtle, but missed when it’s gone.
Using Different Types of Distortion
Some of you might be thinking, “I already have my go-to distortion plugins, do I really need one more?”
Although “less is more” normally reigns true, it’s important to have an array of tools in your creative arsenal.
Every distortion plugin offers you something different. Different plugins allow you to pull different tones from a sound, and it’s up to you to develop a catalogue of tools that you know inside in out.
So although Pedal might not become your #1 distortion unit, it may become number 3 or 4 on your list, offering back up when the others fail.
Further, the harmonics generated by every distortion plugin will be different. This means the harmonics from a Camel Phat will be different then from Trash 2.
That being said, if you use only one distortion plugin across an entire mix, your mix might come off sounding a stale, since it only has one kind of distortion being applied.
Rather, I find it best to use different distortion plugins in a mix, giving your mixes more body and character.
In the same way that a professional mixing engineer has 10 different reverbs and uses each one, I find it helpful to use different types of distortion plugins in a project. It’s a technique that helps me craft rich and full mixes.
De-verbing Drum Loops
Live’s Drum Buss has a handy transient shaper that allows you to accentuate/suppress drum transients.
Many producers only use transient shapers in the additive context, using them to add attack and punch to a sound. They’re also a handy tool to decrease the sustain of a sample.
When pushed to negative values, Drum Buss’s transient shaper will reduce the sustain while still adding attack. In other words, don’t be fooled into thinking negative values mean “less transients”, it means less sustain with more attack.
A creative application of this is to use Drum Buss to remove reverb and room noise from acoustic recordings.
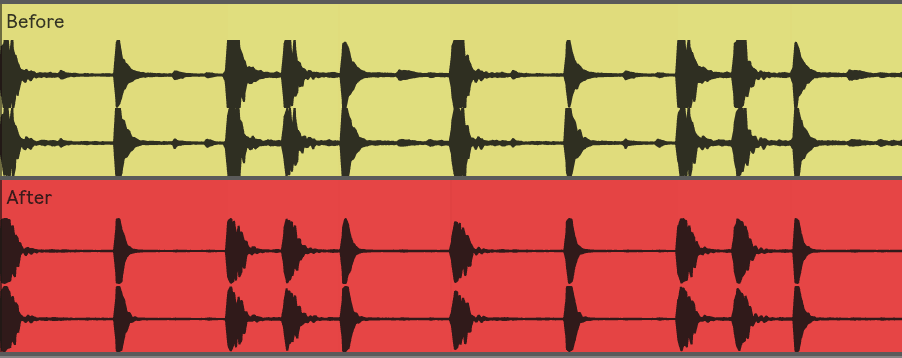
Take the following drum loop.
I added Drum Buss, setting the transient shaper amount to -.70.
The second drum loop is much crisper and sharper without the distracting room noise.
Force To Note & Resampling
The “Boom” section of the Drum Buss is a resonator that can help you get a tailored, tight low end.
As expected, this works well on basses, but it can be used on other low-frequency sounds such as kicks, snares, and toms.
The setup is straightforward: bring Drum Buss onto a bass, then use the Boom/Freq/Decay to dial in correct parameters. The Decay is especially important, as it will affect the low end groove of your track. Tune the Frequency either by ear or to the root note of your track.
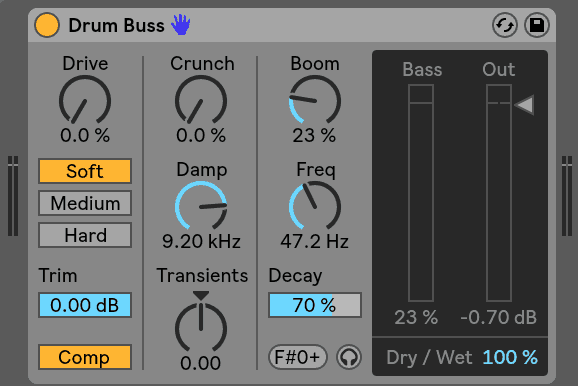
Let’s listen to a before and after of the Drum Buss above applied to an 808.
Before:
After:
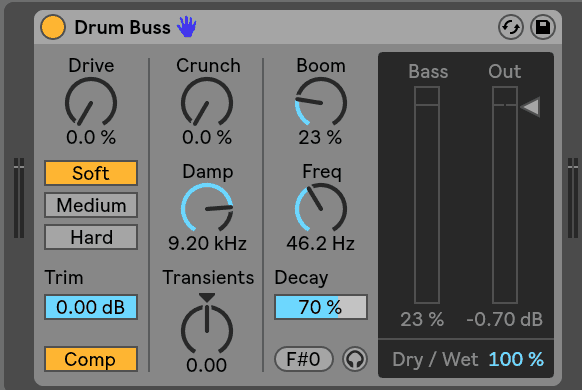
You’ll see in the example above that the note of the “Boom” is tuned to is “F#0-“. This means the exact frequency is a little less then F#0: somewhere between Ab0 and A0. Ideally, you’ll want it tuned exactly to one note, not a few cents above or below. If you click the note, it will automatically lock to the nearest MIDI note.
It’s important to note that the tuning of the Drum Buss resonator (boom) is constant, i.e. it locks to one note. If you’re using it to design a bass, consider resampling the bass once it’s been processed by the Drum Buss. Otherwise, for each note you play it will be resonating at just one specific note (frequency).
For example, in the image above, if the bass note was a C, the “boom” would still be at “F#”. Instead, I could resample the bass at F#0, put it in a sampler, then play the bass melody.
Echo
Ableton Live’s Echo is an incredibly powerful delay device. It models a number of features from vintage delay units, allowing you to craft more compelling and creative delays.
If you haven’t worked Echo into your workflow yet, you’re definitely missing out.
Let’s go over 5 quick tips to get you up and running with this powerful delay device.
Using Ducking to Add Presence
First off, Echo allows you to add ducking within the device itself. This is a powerful mixing technique that allows you to create depth and definition.
You can use ducking to duck the delay underneath the input. This is essentially “sidechaining” the delay to the input, meaning when the input is present, the delay volume is reduced, and when the input is gone, the delay volume is full.
You can control this via the Threshold and Release, whereas once the input signal reaches above a certain threshold, ducking is introduced.
What’s the point of this?
Delays are great, but they can often reduce the definition of a sound. For example, it’s common to have delay on a vocal, but you don’t want the delay to be too obvious or it’ll smear the original vocal, making it less defined.
Instead, you can use ducking to duck the delay when the input it present, having it fill in once the input is reduced. This helps add depth and clarity to a sound.
Let’s look at an example
Take this dry pluck loop.
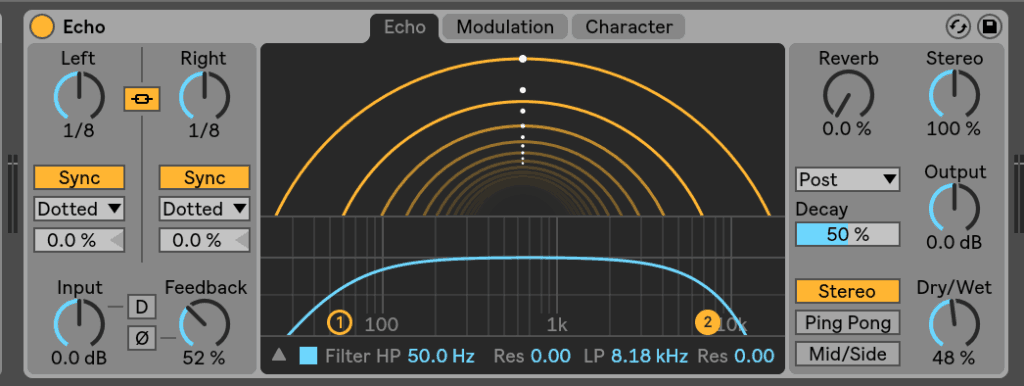
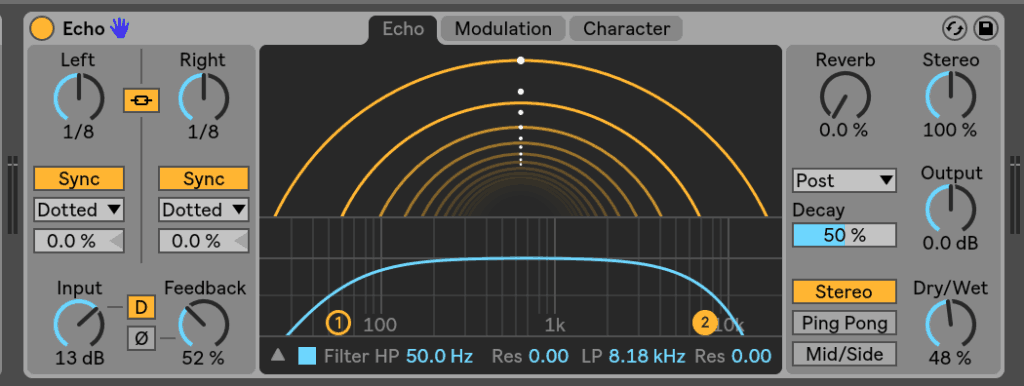
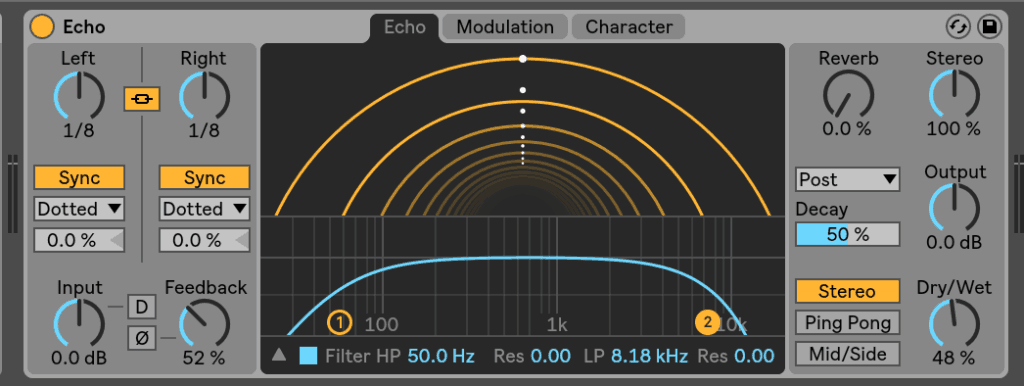
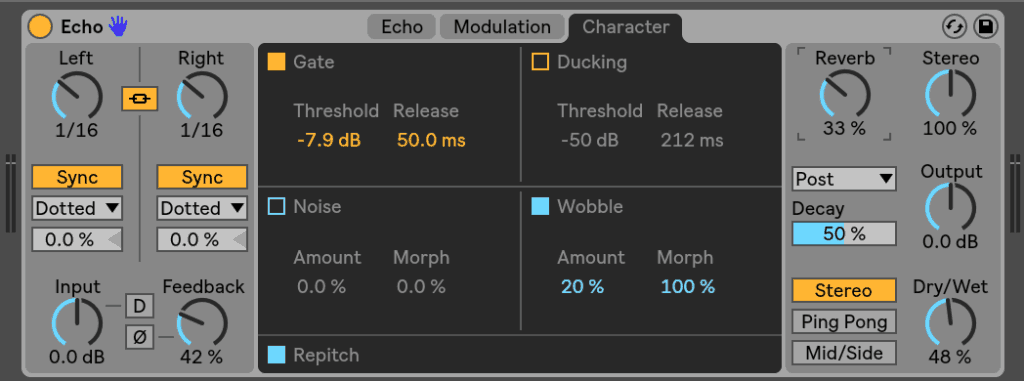
I’ve added some delay using Echo. You can see the settings below. I’m using a dotted ¼ note delay, a small Dry/Wet, and a moderate feedback.
The delay sounds nice, but it drowns out the original sound, especially in the latter half of the loop. I could turn down the delay, but I would lose the depth created by the effect.
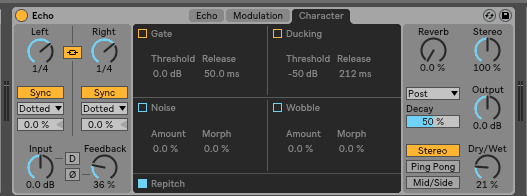
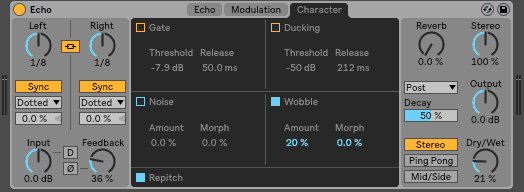
Instead, I’ll use ducking to push the delay underneath the input. I’ve activated ducking, brought the Threshold down to -50db, and set the Release to 212ms.
Compare that to before:
Ducking allows you to gain depth and presence without sacrificing clarity.
Analog Grit
As mentioned, many of Echo’s features emulate effects from vintage delay units. The two controls I’ve found most useful are the Clip Dry and Wobble.
When Clip Dry is enabled, the Input Gain control applies to both the dry and wet signal, instead of just the wet. Higher inputs result in distortion, giving the delay an “authentic hardware feel”. You can activate Clip Dry by clicking the D on the bottom left.
Here’s a quick before and after of Clip Dry being applied to a sound. In the first example, I have a pretty heavy dotted 1/8th delay with no Clip Dry applied. In the second example, I activated Clip Dry and boosted the Input Gain, creating more audible distortion.
Before:
After:
The second example is filled with all that warm, analog goodness.
It took me longer then I’d like to admit to realize that Clip Dry is called so because Echo is “clipping the dry signal”. Better late then never.
The other effect I frequent is Wobble.
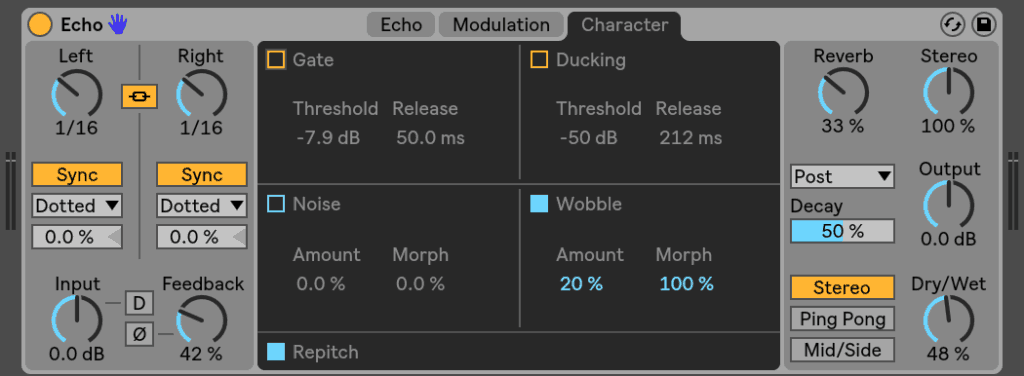
Underneath the Character tab in Echo, you can turn on Wobble which “adds an irregular modulation of the delay time to simulate tape delays”. The result is a subtle pitch modulation that can create both subtle and aggressive pitch movement.
Let’s listen to a few examples, giving you a taste of this effect in action.
Dry:
Wobble Activated, Amount 20%:
Wobble Activated, Amount 40%:
Wobble Activated, Amount 80%:
Whether you’re going for a subtle analog pitch drift or more aggressive effect, Echo’s got you covered.
Distortion Device
You can utilize the Clip Dry feature to make Echo a standalone distortion device. Here’s how.
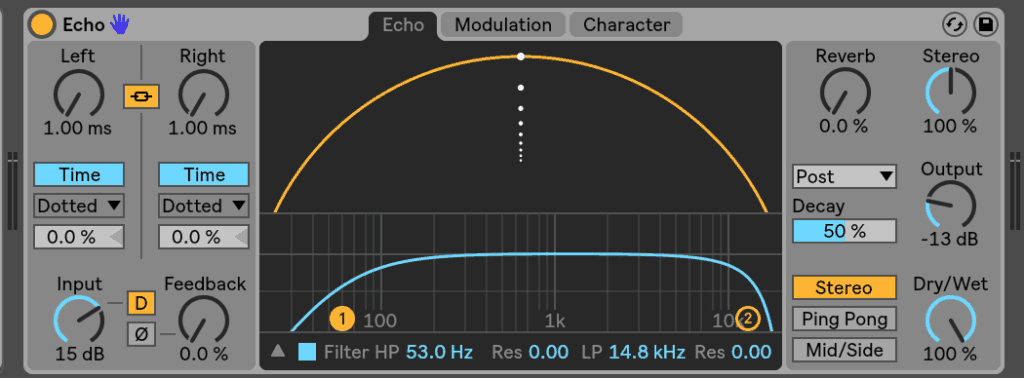
- Set the time of both channels to 1ms (i.e. as fast as possible)
- Set the Feedback to 0%
- Set the Dry/Wet to 100%
- Set the filter curve so it’s all the way open
- Turn on Clip Dry and boost the Input Gain
With this setup, all you’ll hear is the first delay 1ms after the original with distortion added via the Clip Dry.
Let’s listen an example of this on a Rhodes piano.
Before:
After:
The effect is subtle, but the latter example has a bit more character and color then the first.
You could also use this in parallel, scoping out certain tones with the bandpass then adding them into the original.
Mid/Side Delay
Alongside the typical Stereo and Ping-Pong delay modes, Echo allows you to create a Mid/Side delay.
Mid/Side delay allows you to process the mid and side channels separately with different decay times. It allows you to craft a character and image that’s hard to replicate elsewhere.
The easiest way to showcase this is with an example.
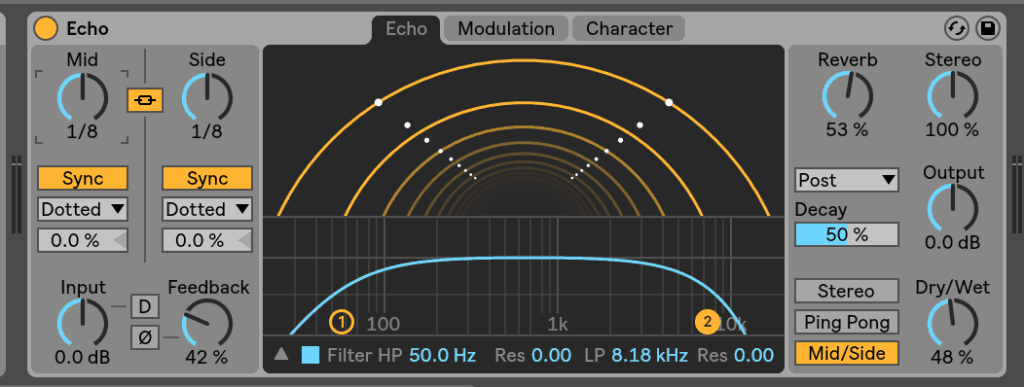
First, I have a basic delay with both the mid and side channels synched to a dotted 1/8th note delay.
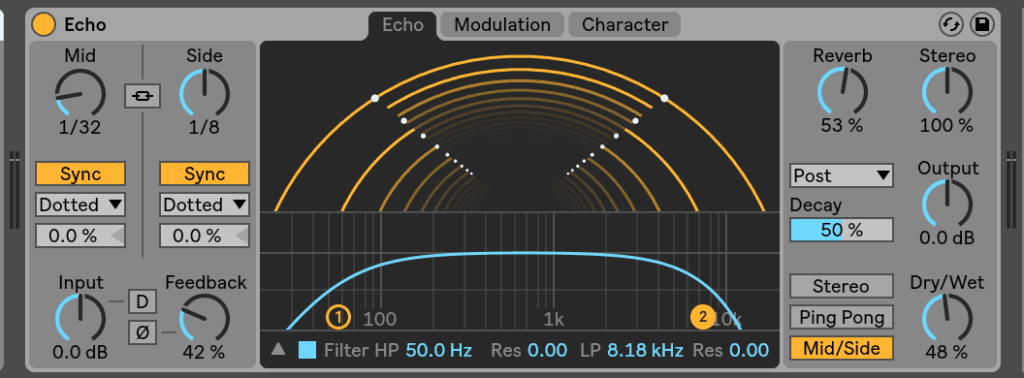
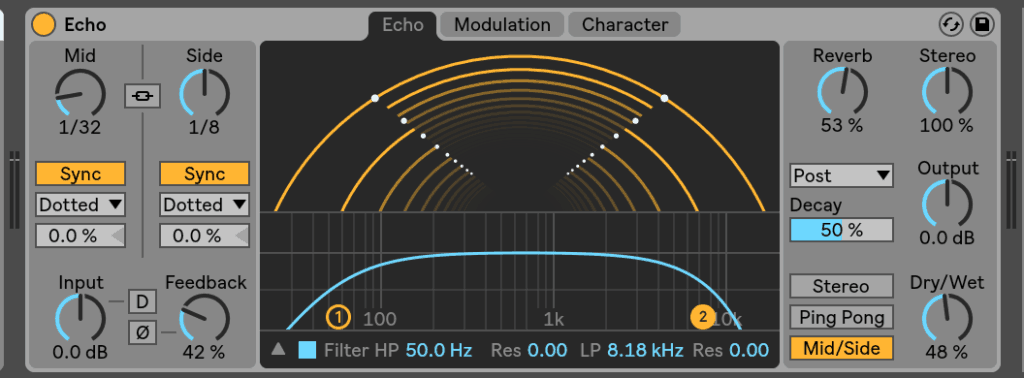
Next, I kept the delay of the sides at a dotted 1/8th note, but set the mids to a dotted 1/32nd note. Take a listen:
Isn’t that sweet?
There is a fast delay in the center that’s paired with a slower delay on the sides. This in extremely powerful tool to craft a more compelling stereo image with a delay that doesn’t relay on the overtly obvious ping pong mode.
I could tell you where you could use this effect, but I’d rather see you challenge yourself to find useful applications.
Creative Gating
Echo’s Gate allows to you mute the wet signal when it’s below a certain threshold. In other words, you can set it so the delay is muted white quieter inputs, but present on louder inputs.
Let’s look at one practical and one creative use of this.
Putting on my mixing engineer’s hat, a practical example is to use the gate so that only “important” information opens the delay, while “unimportant” information doesn’t.
For example, let’s say you had a recording of an acoustic guitar. You could set the gate so that it only opens when the guitar is playing, making sure it’s closed when it’s not. That way the delay isn’t applied to the noise in between each strum, such as room or human noise. This will help cleaning up and de-clutter your mix.
Now, let’s look at a creative use of this effect.
You can use Echo’s Gate to add emphasis and depth to a track. You can adjust the Gate’s Threshold so it only opens up on the loudest notes on a sound.
A prime example would be on a vocal, using the gate to add emphasis to louder words and phrases.
Let’s look at an example.
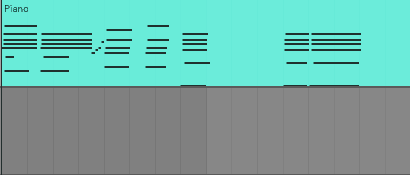
Below I’ve got a tasty lick. The velocity is slowly increasing over the duration of the clip, which in turn is increasing the volume of the instrument.
I’ve added a dotted 1/16th note delay using Echo. Let’s take a listen.
It sounds fine, but it doesn’t drive home that landing as much as I would like it to. To remedy this, I activated the Gate, adjusting the Threshold so only the last (i.e. the loudest) note opens up the gate.
Pedal
Ableton Live’s Pedal is a powerhouse distortion unit that can add grit and body to drums, synths, basses, and of course, guitars. Featuring three different styles of Pedal, it’s a flexible device that can be easily worked into your workflow.
Let’s check out 5 quick tips to get you up and running with the device.
OD On Everything
The Overdrive (OD) Pedal sounds great on just about everything.
Lately, I’ve been putting it on synths, basses, drums, and vocals.
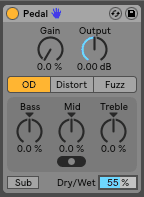
Even when a track sounds great, adding a bit of Overdrive can give it that extra edge. I’ll normally keep all settings at O and adjust the Dry/Wet to taste. It’s a great way to warm up a sound without introducing obvious distortion.
Here are a few comparisons of sound with and without the pedal. The effect is subtle, but effective,
Guitar
Before:
After:
Drums
Before:
After:
Bass
Before:
After:
Know Your Signal Flow
If you’re trying to work Pedal into your workflow, you’ll need to pay special attention to where it’s placed in the device chain.
Placing Pedal before or after a compressor will yield two different results. Placing it after the compressor may result in a more even distortion, while placing it before will accentuate the peaks, achieving a more aggressive distortion. The right choice will always depend on context.
My advice is if you want to use Pedal to add distortion of a sound, be sure to ask yourself where in the device chain it should fit.
If you’re not sure where to place it, simply experiment. Don’t just throw it on the end of your chain and feel disappointed if it doesn’t work, spend a few minutes working it into your effect chain.
Let’s look at an example of how I might approach this. Below I have a signal chain with reductive EQ, Saturation, and OTT compression. Where would it make sense to put Pedal in this device chain?
If I put it at the start of the chain, it will distort the high and low frequencies I’m cutting out with the EQ. This probably won’t sound too great.
If I put it at the end of the chain, it will distort some of the harsh frequencies brought out by the OTT. Again, might not be the best spot.
This leaves it to before or after the Saturation. It could go either way, so I’d likely try it both before or after the Saturator, listening for which place sounds best.
This is a more theoretical approach, but I wanted to give an example of how I approach making mixing decisions in context.
Warming Up Sub Basses
There are two ways I like to warm and fatten up sub basses with Pedal.
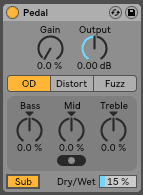
The first way is to put it directly on the Sub on Overdrive mode with a Dry/Wet between 5-30%. Simply activate the “Sub” toggle, giving an extra low frequency boost.
Before:
After:
The next way is to put it on Fuzz mode in parallel and focus in on low-mids. The adds warmth and texture to a sub bass that helps it pop out of the mix.
My signal flow looks like this:
Before:
After:
Drum Fuzz
The first part of this tip is borrowed from the Live user manual.
You can use Pedal to add a fuzz and sizzle to drum loops.
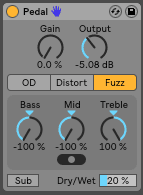
Bring Pedal onto a channel, set the pedal type to Fuzz, set the Bass & Mid knobs to -100% and set the Treble knob to 100%. This will attenuate the distortion at mid and low frequencies, while boosting it on the high end.
Lastly, dial back the Output and bring down the Dry/Wet. The result is an almost tape-style effect whereas noise and compression are added to the loop.
Before:
After:
This trick is cool but often a bit too aggressive. My recommendation is to use this technique in parallel.
Your signal flow may look something like this.
Before:
After:
Much better.
Running the Pedal in parallel allows you further control over the harmonic distortion.
Tone Shaping
In the tip above, I used Pedal’s frequency knobs to boost/attenuate the distortion around certain frequency ranges.
You’re doing yourself a disservice if you use the effect without adjust the timbre of the distortion. These knobs allow you to focus the distortion on certain frequencies, giving you full control over the tone and character of your sound.
Here are a few examples of how to use Pedals three-band EQ:
- Distortion can sound harsh on bright sounds like supersaws. Use the Treble control to dial back the distortion on the highs. This will give you a strong body in the mids while keeping the highs nice and clean.
- The knob below the EQ controls the center position of the Mid frequency. The furtherest left setting is centered at 500 Hz, the middle is centered 1 kHz, and the right is centered at 2 kHz. It’s well worth the 5 seconds it takes to try out all three setting.
- The Bass control can add additional distortion to kicks and sub basses.
- The Treble control can help add presence and air to percussion loops.
Want to optimize your workflow in Ableton Live?
If you enjoyed this article, check out my book The Ableton Workflow Bible. Shave months off your growth learning the tools, techniques and secrets that Ableton pros already know and use.


