I’ll admit, I’m a big Ableton Live fan. But as an ex-FL Studio user, I really miss the Piano Roll, among other great features.
Why? Well, as you’re about to see, it’s extremely powerful. So powerful, that I could probably find 200+ tips to write about it.
But who wants to sift through over 200 tips? You probably just want to hear the best ones, right?
So I’ve curated the most useful and unique piano roll tips here so that you can really start to unpack the power of this wonderful tool. Shortcuts, tools, creative techniques – you name it.
Besides, you know we’re a big fan of improving workflow through tips if you’ve been following us for a while.
As always, it’s easy to skip through and read a couple, but make sure to give each one a go and see how you can work it into your production workflow. You’ll be surprised at what you can learn.
These tips are current as of FL Studio 20, which you can buy here. Nonetheless, let’s have a look at what FL Studio’s piano roll has to offer.
Note: If you’re an Ableton Live user, check out our piano roll video here.
Table of contents
- Tip 1: Note Properties
- Tip 2: Move Selected Notes Up/Down
- Tip 3: Move All Notes Up/Down
- Tip 4: Portamento/Slide
- Tip 5: Allow Resizing From Left
- Tip 6: Move To Selected Channel
- Tip 7: Cycles Through Channels’ MIDI
- Tip 8: Hide The Velocity Editor
- Tip 9: Adding Markers
- Tip 10: Duplicate MIDI with ‘Save score as…’
- Tip 11: Playback Tool
- Tip 12: Edit Ghost Notes from Other Channels
- Tip 13: Change the Keyboard Style
- Tip 14: Stamps
- Tip 15: Group/Ungroup Notes
- Tip 16: Discard Lengths
- Tip 17: Chop Notes
- Tip 18: Glue Notes
- Tip 19: Arpeggiator
- Tip 20: Strum
- Tip 21: Riff Machine
- Tip 22: Quantize
- Tip 23: Remove Note Snapping
- Tip 24: Select Random Notes
- Tip 25: Scale Highlighting
- Enough Tips?
Tip 1: Note Properties
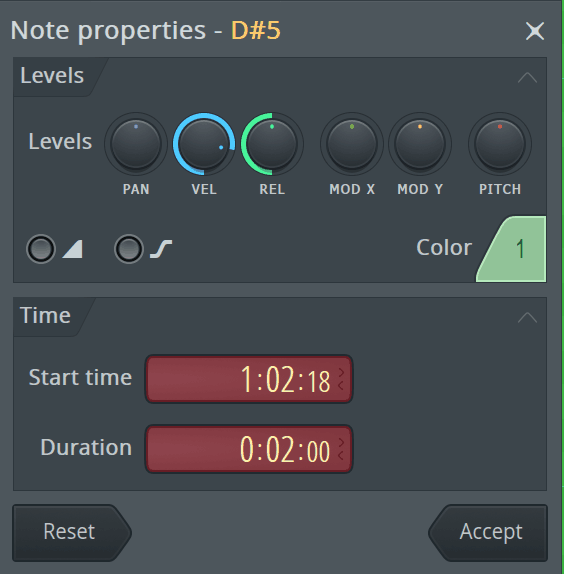
Starting off simple – did you know that double-clicking on any note in the Piano Roll allows you to specifically edit is properties?
Colour, velocity, start time, duration, pitch, pan and much more can all be configured, giving you precision control over your notes. If you ever stuff up, just hit reset to change it back to the defaults.
Oh, and you can hit play to preview the note on its own.
Note that this only works with the Draw or Paint tool selected.
Tip 2: Move Selected Notes Up/Down
This might seem obvious right? Not so. Moving up or down with the arrows actually changes the view position in the piano roll. Moving the notes requires you to select them, hold Shift + Up/Down arrow, and they will move up or down a semitone at a time.
If you want to take this one further, try holding Cmd or Ctrl to move up/down a whole octave. A beautiful way to try out sounds on different octaves.
Tip 3: Move All Notes Up/Down
A more impressive way to move ALL notes in a clip up or down would be to imply just press Shift (+ Cmd or Ctrl for an octave) without having any notes selected. This moves all of them at once, which is helpful for trying different key signatures or registers.
Tip 4: Portamento/Slide
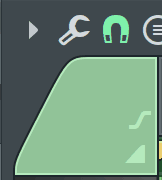
If your a big fan of the native plugins in FL, or at least occasionally dabble in them, you’ll want to try out these unique features available in the piano roll. You can add a per note portamento or note slide (the difference between which is a short slide vs a timed slide). This is great for momentary expression or more technical editing.
Activate either mode up in the top left as pictured above. Portamento is the curved line and slide is the triangle. Any notes drawn with either selected will consequently have an icon, indicating the note has portamento or slide enabled.
Tip 5: Allow Resizing From Left
If you play notes into a clip by recording with a MIDI keyboard, usually they may be off time. Or sometimes you want to adjust the rhythm. In most DAWs, and be default in FL Studio, you’re forced to move the whole note then adjust the duration accordingly, especially if you want the note to end at the original point in time.
What if I told you that there is a hidden feature that allows you to adjust notes from the beginning of the note. Head to the Menu and hit Edit > Allow resizing from left, or hit Cmd + Alt + Fn + Left (Mac) or Ctrl + Alt + Home (Windows). Now you have a lot more editing freedom and flexibility.
Tip 6: Move To Selected Channel
A quick Alt + K sequence will switch you over to the currently selected channel in your Channel Rack. No more clicking or navigating to the right pattern.
Simple as that.
Tip 7: Cycles Through Channels’ MIDI
If you need to quickly switch to another channel’s MIDI, use Cmd + K (Mac) or Ctrl + K (Windows) to cycle through the channels on your channel rack. This makes it super quick to move to the channel you need without a ton of unnecessary clicks. You’ll thank me later.
Tip 8: Hide The Velocity Editor
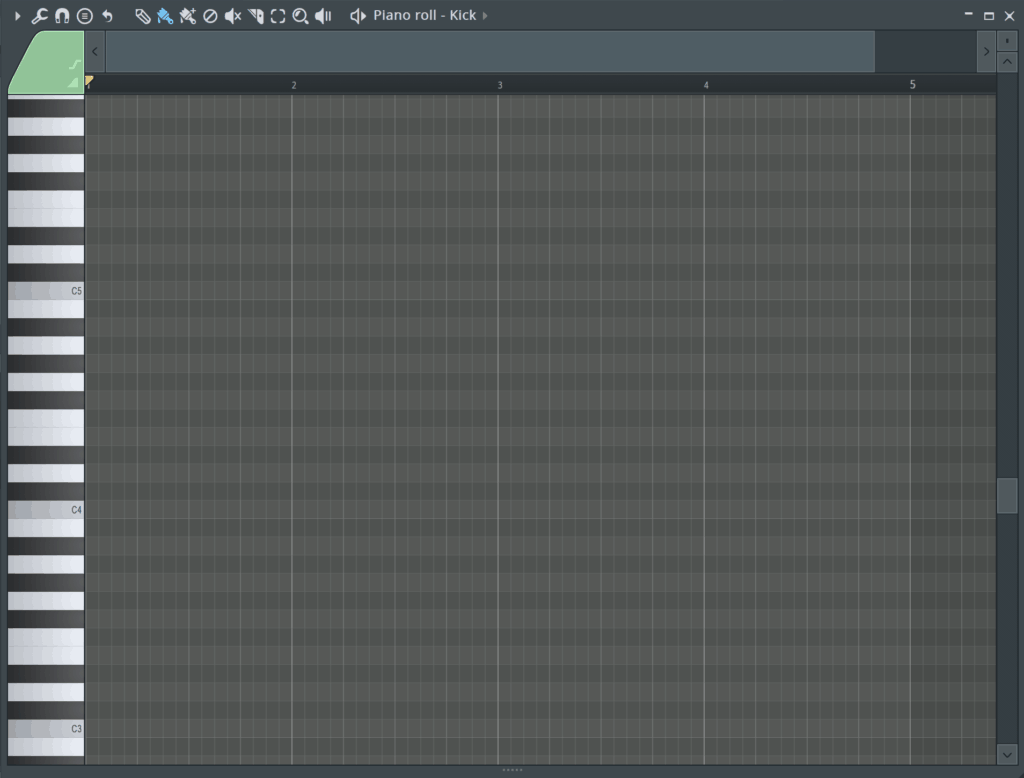
Everyone should try editing the velocity of their notes when writing a chord progression, melody, bassline or any sort of MIDI pattern. It can certainly help to add a degree of humanity to an otherwise bland chord progression.
But sometimes, that editor down the bottom is taking up valuable screen real estate. So press Shift + Enter to tuck it under the bottom. It’s the same shortcut if you ever need to bring it back.
Tip 9: Adding Markers

You may or may not be familiar with markers from using them in FL Studio’s playlist, but either way, they are incredibly handy.
You can use them to mark out different sections, to set loop points, or to add reminders for yourself later.
Whichever you use, just navigate to a point in time that you want to add one, hit Alt + T and give your marker a name. Never be confused again.
Tip 10: Duplicate MIDI with ‘Save score as…’
If you’re working on notes in the piano roll, and want to see how they sound layered with other sounds, the typical producer will select all the notes, probably press Cmd + C (Mac) or Ctrl + C (Windows) and navigate to the next pattern, pasting the notes.
This is fine, but it’s way too slow if you want to speed up your workflow. Simply press the menu and click File > Save score as… but instead of letting go, drag over to the channel you want to copy the MIDI to on the Channel Rack. Releasing the mouse will drop the MIDI right onto that channel.
If you’ve played around with the mixer, this feature works exactly the same as duplicating plugins.
Tip 11: Playback Tool

Sometimes you write a really bad pattern or progression. Sometimes it’s so good and you don’t know why (especially if you’re inept at music theory like I was when I started).
Either way, you want to zero in on the places that are making or breaking your patterns. To do this, you can switch over to the playback tool by selecting it from the menu (the speaker icon with the pause) or just hit Y (Shift + Y if you have the computer MIDI keyboard enabled). Now, with the pattern paused, hover the neon line over different areas and click – immediately you’ll hear the note content of what is going on at that point of time.
Now you can hear exactly what is going on at every point in your patterns, delete what sucks, and emphasise what sounds good.
Tip 12: Edit Ghost Notes from Other Channels
In the last few years, Image-Line introduced a feature where you can see the notes and sequences from other patterns. This is great to utilise when coming up for instrumentation and an arrangement that sounds good. If you want to turn it off though, you can press Alt + V.
But that’s not the main tip here. To take this one further, press Cmd + Alt + V (Mac) or Ctrl + Alt + V (Windows) to make those notes editable. This is handy for making on-the-fly adjustments to notes across all of your channels without leaving the current piano roll.
Tip 13: Change the Keyboard Style
This is a bit of a fun one, but you can indeed change the look of the piano roll keys on the left, by navigating to the menu and selecting an option from View > Keyboard style settings. You have five options: Classic, Modern, Flat, Dark and List. Here’s what each of them looks like, for reference.

Classic 
Modern 
Flat 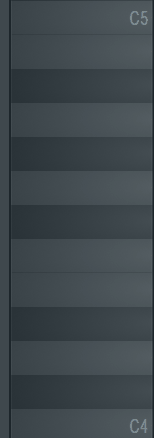
Dark 
List
Tip 14: Stamps
I’ll admit – I’m an avid Ableton Live fan. But FL Studio absolutely dominates Live with this feature.
Stamps are a way to add entire chords to your patterns by selecting a scale and a chord type. Choose a root note and a chord type: major, minor, diminished, seventh, you name it. Apart from it being quick, it’s a great way to learn chord names. Best of all, they stay grouped so you can move the whole thing around, adjust the timing and treat it as if it were one note, while still having the flexibility to ungroup them later, which is the next tip.
Tip 15: Group/Ungroup Notes
Whether it’s a simple motif, a chord, or any collection of notes – you can group them together so that your ideas don’t become fragmented in the inevitable chaos that is editing MIDI notes. Simply hit Shift + G with the notes in question selected, then you’ll be able to move them, change their length and more as if they were one note.
As you might have gathered in the last tip, Stamps group the notes of a chord together by default. So inevitably, sometimes you want to separate the notes to make slight adjustments. To reverse the grouping process, hit Alt + G and they’ll all be back to their individual selves once again.
Tip 16: Discard Lengths
One benefit of using the step sequencer over the piano roll is that it plays the full length of a sound until the end of the sample, or until the note is re-triggered. As you will have noticed, drawing in notes in the piano roll will give them a specific length, determined by the last note you were editing.
Additionally, you may have noticed that converting steps to the piano roll gives them a strange shortened-note looking graphic for each note. This means it’s still being treated like a step in the step sequencer. You can drag the lengths out to convert them into notes, but how about the other way?
To discard the lengths of notes and turn them back into steps, select the desired notes and hit Shift + D. Now you can treat it like a step sequencer but with the added flexibility of using multiple notes.
Tip 17: Chop Notes
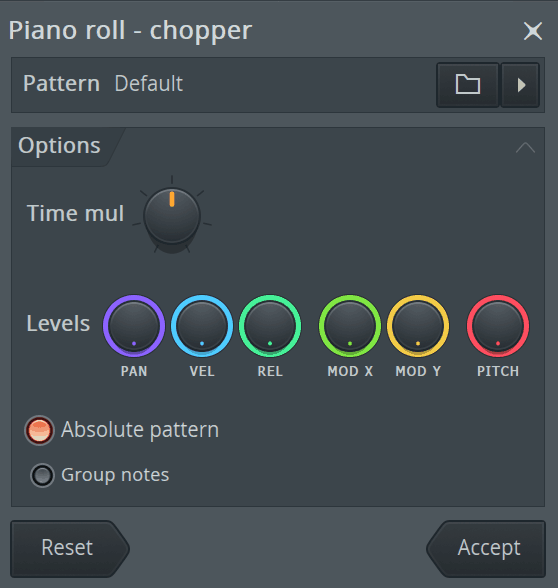
The chopper is one of those tools that you’ll keep coming back to, especially if you want to add more rhythmic interest into your fire trap beats (or whatever genre you make, no assumptions here).
Alt + U is your friend for this trick. Pressing it brings up the chopper window, allowing you to select a chopping preset to introduce a particular rhythmic pattern. The default option is a basic rhythmic chopper, slicing your notes into timed intervals like 1/4th, 1/8th, 1/6th etc. – all based on the Time Multiplicator knob.
You have the added ability to customise the expression of the newly-generated notes by moving the colourful pan, velocity, release etc. knobs, which can be an interesting way to get unique variation in your patterns. Lastly, you can group these notes by selecting the corresponding button if you so wish. Now you have a new, compelling rhythmic pattern, all in a few clicks.
Tip 18: Glue Notes
Opposites seem to be a running theme in this list of tips, but if you do something to your notes, it’s always good to know how to undo it.
If you have a variety of notes alongside each other, whether it be due to chopping or the way you’ve drawn your pattern, you can combine them into one long note through glueing.
Cmd + G (Mac) or Ctrl + G (Windows) will magically join all your adjacent notes into one big long one. Good to know how to do.
Tip 19: Arpeggiator
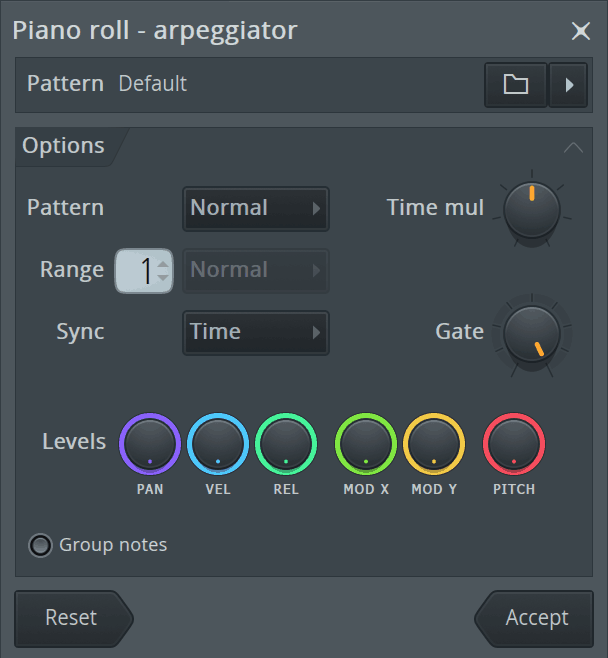
One of the cornerstones of the FL Studio piano roll, and another thing that makes me say, ‘damn I wish Ableton Live had this!’
You may have used an arpeggiator before, but maybe not one that’s built into the piano roll, and one that generates notes right in front of your eyes. Interested? Start by selecting your notes and pressing Alt + A.
This tip works best with a chord selected, otherwise, with one note, it functions similar to the chopper. Otherwise, you can create complicated arpeggiated patterns based on the interplay between the notes. Like the chopper, there are a bunch of useful presets you can load up.
Tip 20: Strum
Achieving a certain level of human feel in your patterns can help your music come across as more expressive and interesting. Block-y chord progressions and stale melodies can often bore the listener after a while, or maybe even bore you – the producer.
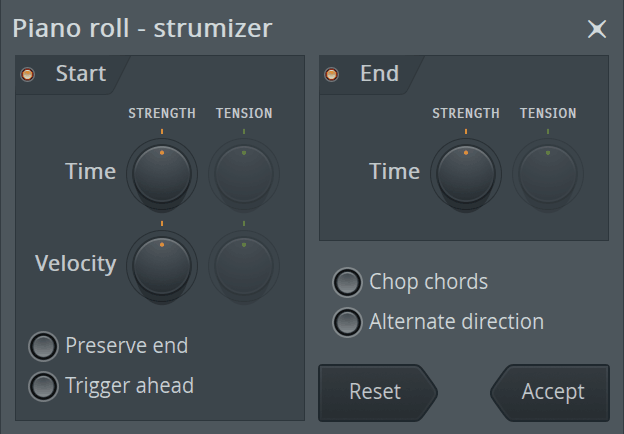
The strum function ‘slides’ the notes up or down, as if you were playing on a guitar or sweeping the notes on a piano. So, press Alt + S to bring up the appropriately-named ‘Strumizer’.
You’ll see you have strength and tension controls for both the start of the selected notes and the end. Strength determines how accentuated the strum will be, and tension determines how relaxed or tight the strum feels over time. Also, you can adjust the velocity with the same process, furthering the human-feel of the result.
Underneath, there are a few self-explanatory controls that slightly adjust the end result, like preserving the original endpoint of the notes and more. When you’re done, hit Accept to commit to the result. Now you have a shimmering, beautiful chord sound rather than a robotic, dry one.
Tip 21: Riff Machine
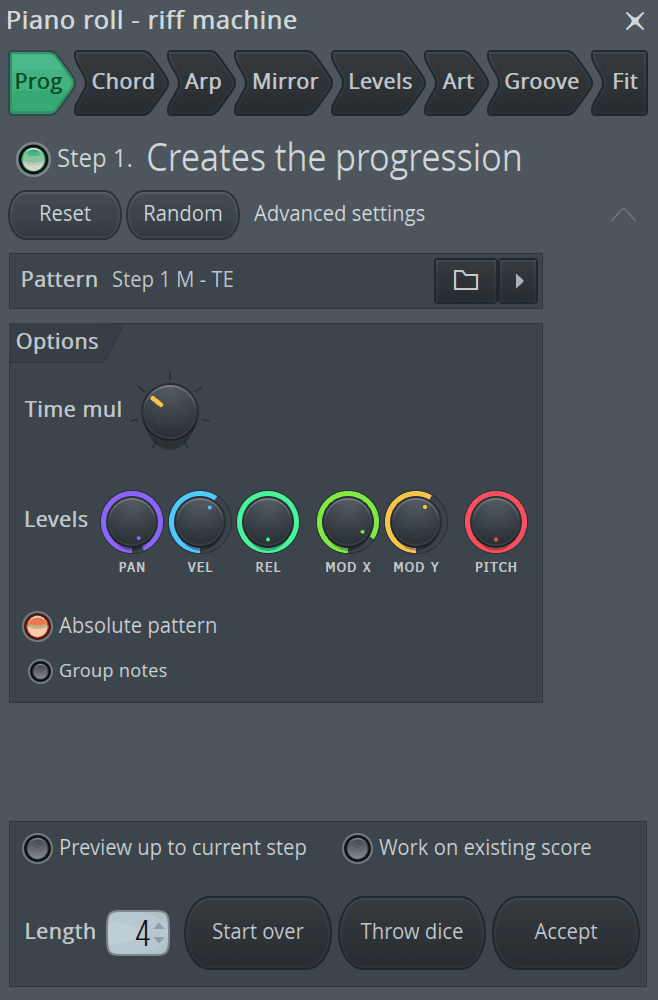
I could go on all day about how useful some of these tools in FL Studio are, but I only have time to mention the best ones. The riff machine is one of them.
If your musical inspiration tank is running on empty, then the riff machine is a great way to refill it. Load it up by pressing Alt + E and you’ll be introduced to the crazy Riff Machine creator, with endless possibilities. My personal favourite way to use it is to press the ‘Throw Dice’ and ‘Random’ buttons, adjusting the ‘Time Multiplicator’ knob.
Feel free to explore and adjust the multiple steps in the process at the top, adjusting each one to taste as you like.
Tip 22: Quantize
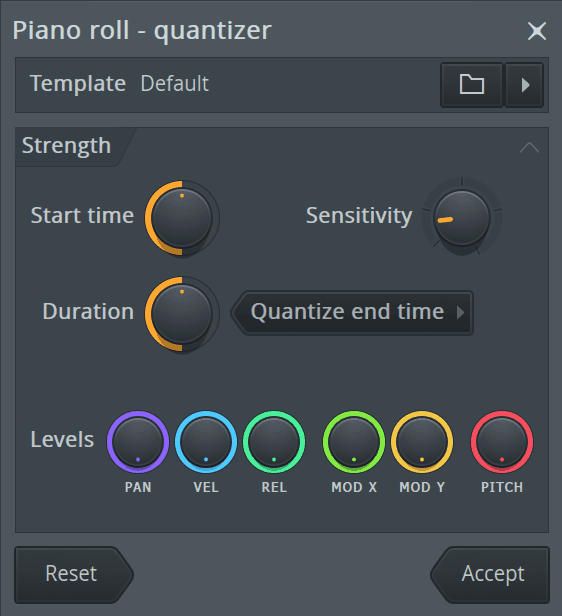
Got notes that are all over the place, and need to tighten up the timing? Hit Alt + Q to bring up the quantise dialogue box.
As with many of the previous tools we’ve been over, you can choose from a template. But to get precise with the strength of the quantisation, adjust the start time, sensitivity and duration to sort out the timing. Setting the start time to full will quantize the notes 100% on the grid, depending on the snap size in the settings. And speaking of snapping…
Tip 23: Remove Note Snapping
Here’s one for those who are into producing looser genres like hip hop, where you can make the timing a little freer.
While you can change the snap settings to the desired state (none in this case), sometimes you only want to temporarily drag a selection of notes off the grid, maintaining your normal snap settings for the majority of producing you intend on doing.
To momentarily disable snapping, hold Cmd while dragging notes. You’ll notice they nudge only slightly in the direction you want them to.
Tip 24: Select Random Notes
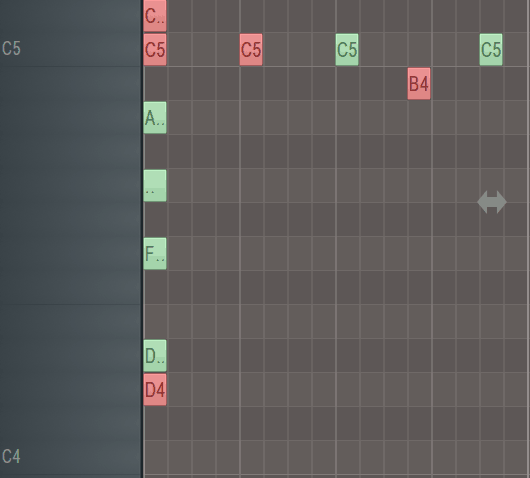
Here’s an oddball – you can select notes at random. Why on earth would you want to do this? Maybe to:
- Adjust the lengths of random notes to experiment with timing differences
- Delete random notes to see how the silence can add something that was missing in your track
- Adjust the pitch of random notes to create a new melody
- Change the velocity to add accent to other notes
That’s just a few ideas, but to do it, press Shift + R to select a random note. Pressing it consecutively will select additional notes. However, if you just want to choose a bunch of random notes from the get-go, just press Shift + M instead, and you’ll be able to edit the resulting selection from there.
Tip 25: Scale Highlighting
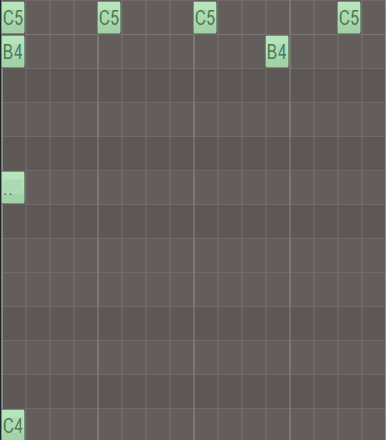
Saving one of my favourites for last, the scale highlighting ability in the piano roll makes it almost too easy for those who aren’t quite comfortable with music theory. Even for those who are, it can be a great way to jot down an idea quickly without making any note mistakes.
Head to the menu and select Helpers > Scale highlighting and choose a root key and scale. There are a lot of options, but Major and Minor Natural (Aeolian) are the most common two scales. You can also choose automatic if you want to adapt to what you’ve already written.
Enough Tips?
If the piano roll tips for FL Studio are not enough for you, check out our 100 FL Studio tips article we mentioned earlier. Or, if you’re just starting in FL, check out the FL Studio Complete Beginner’s Guide. If I missed anything, drop me a line at [email protected].

